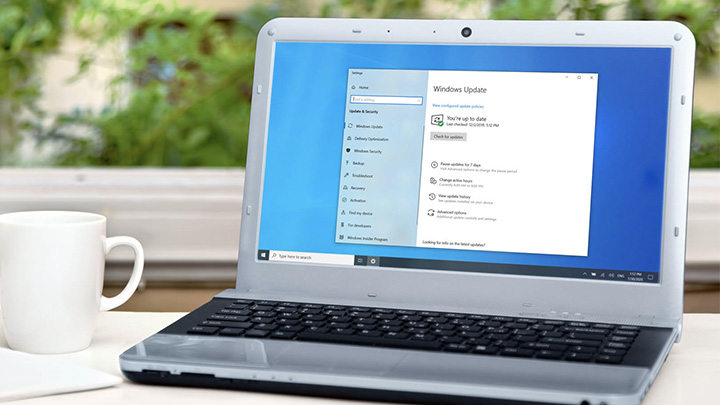
Formatting a USB flash drive is something most computer users don’t think about, as most drives are formatted out of the box, and ready for most use cases. However, there may come a time when you need to completely erase all the data on your drive, or you need to make the drive compatible with a different type of computer than it has already been formatted for. If you’ve ever experienced a flash drive working on a PC but not on a Mac or vice-versa, it’s the drive’s formatting that’s usually the culprit. This article will explain how to format your drive in Windows and on a Mac OS 10+.
What is formatting?
Formatting is the process of prepping a storage device, like a hard drive, solid-state drive, flash drive etc, to store information. It creates a filing system that organises your data and allows you to maximise the space for your files. It’s typical to format a drive when a new operating system is going to be used or additional space is required.
There are two types of formatting on a USB drive:
- Quick format: Deletes the file system table and the root folder. This option is frequently used for USB flash drives to efficiently free up the available space to transfer or store other files. It’s not the most secure way to delete your files because the data may still be recoverable with data recovery tools.
- Full format: Will scan for bad sectors and write zeros in all sectors, which deletes all data permanently. This action can take a long time, depending on the capacity of the drive.


")